Practice Trades BWB+Cal 1.3 (Part 2)
Posted by Mark on February 1, 2022 at 06:58 | Last modified: December 13, 2021 17:50Today, I want to finish reviewing the backtrade discussed last time.
Were I to take the [farther OTM] prescribed adjustment at 11 DTE (fourth paragraph here):
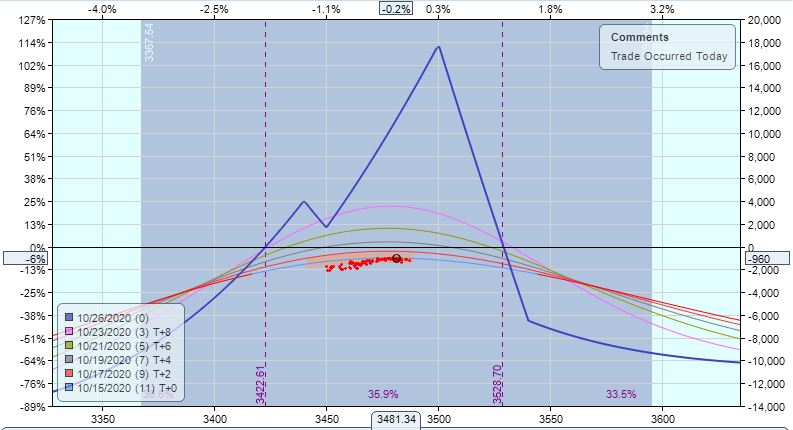
Loss here is $960 here on consequent margin requirement (MR) of $15,735 (-6.1%).
Second adjustment point is hit with 7 DTE and trade down $1,285 (8.2%):
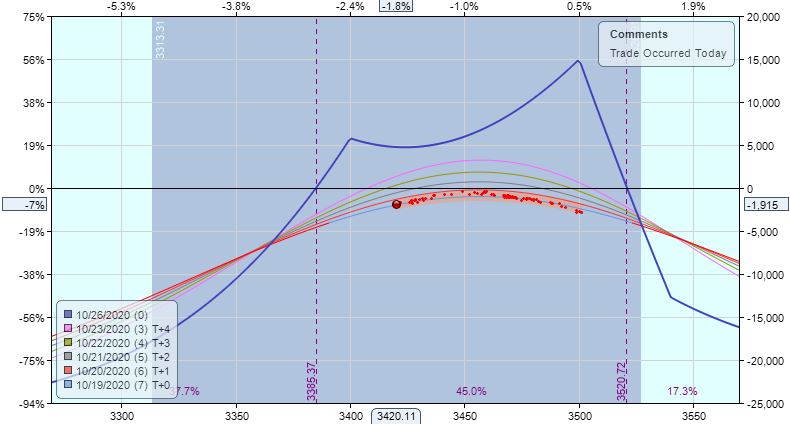
This puts me down $1,915, which is 7.2% of consequent MR $26,570. The T+x lines are more positive than negative, which is good. This is a somewhat directional trade with NPD 53, but TD is a robust 12.
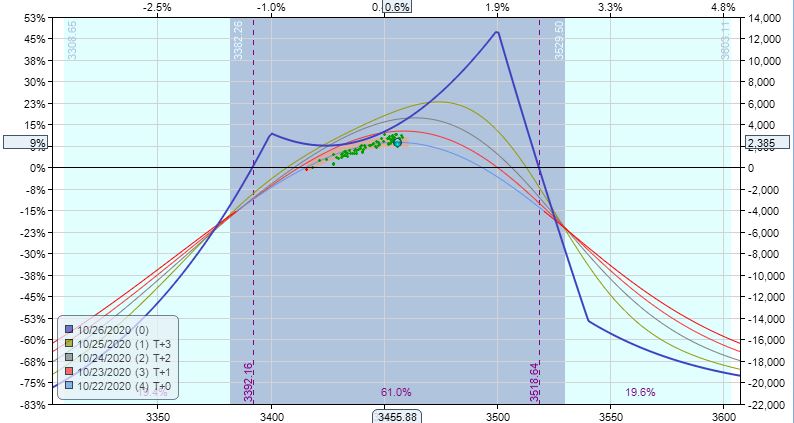
I become profitable (+$209) the very next trading day.
Two days later at 4 DTE, I hit the profit target up $2,385 (+9%):
Whether done “right” or “wrong,” this seems like a challenging trade because of the need to stare big unrealized losses in the face (-$2,920 by ignoring first adjustment point and -$1,915 by following guidelines). The only way to avoid these big losses would be to monitor adjustment points continuously, which violates the once-daily monitoring concept of the strategy.
The losses may not be extraordinarily large on a percentage basis if I position size for a potential 2-3x capital expansion. I just don’t yet know how the numbers pan out over a large sample size of trades. Those reaching profit target without adjustment will earn 5% of a minimal MR. A % ROI profit target inversely proportional to current MR could make sense.
This is probably an age-old question that pertains to any strategy where adjustment significantly impacts MR.
Categories: Option Trading | Comments (0) | Permalink